This page contains information on how to install dSPACE ControlDesk software and work with MicroLabBox 1 through Simulink. This page should give you an idea on the necessary stuff needed to build models and flash them onto MicroLabBox for custom micro-controller operation.
Installing stuff
- dSPACE licensing dongle

You need to have this sort of dongle which is the key component. The license ID lets you create an account with dSPACE. With Licence ID you need to request for clearance with dSPACE, which will be given in couple of days. - Download and install dSPACE installation manager from this page .
- From dSAPCE website download dSPACE Release 2024-A 2 DVDs merged ZIP and dSPACE Release 2024-A Solutions DVD or for whichever version you are working with (I have used 2024-A version).
- Extract both of these files then follow this page to install them, installing is pretty starting forward.
- Make sure you have installed Matlab and Simulink with Simulink coder and other necessary modulus like Simscape electrical or anything you need for model development (I have used 2024-a version for Matlab).
Decrypting stuff
It is necessary for the License dongle to be connected with the computer to operate any dSPACE software (like ControlDesk). Before we could use the software, the License dongle will decrypt the modules / submodules in the software for which we have obtained license for. You will know which products you have license for through this option.
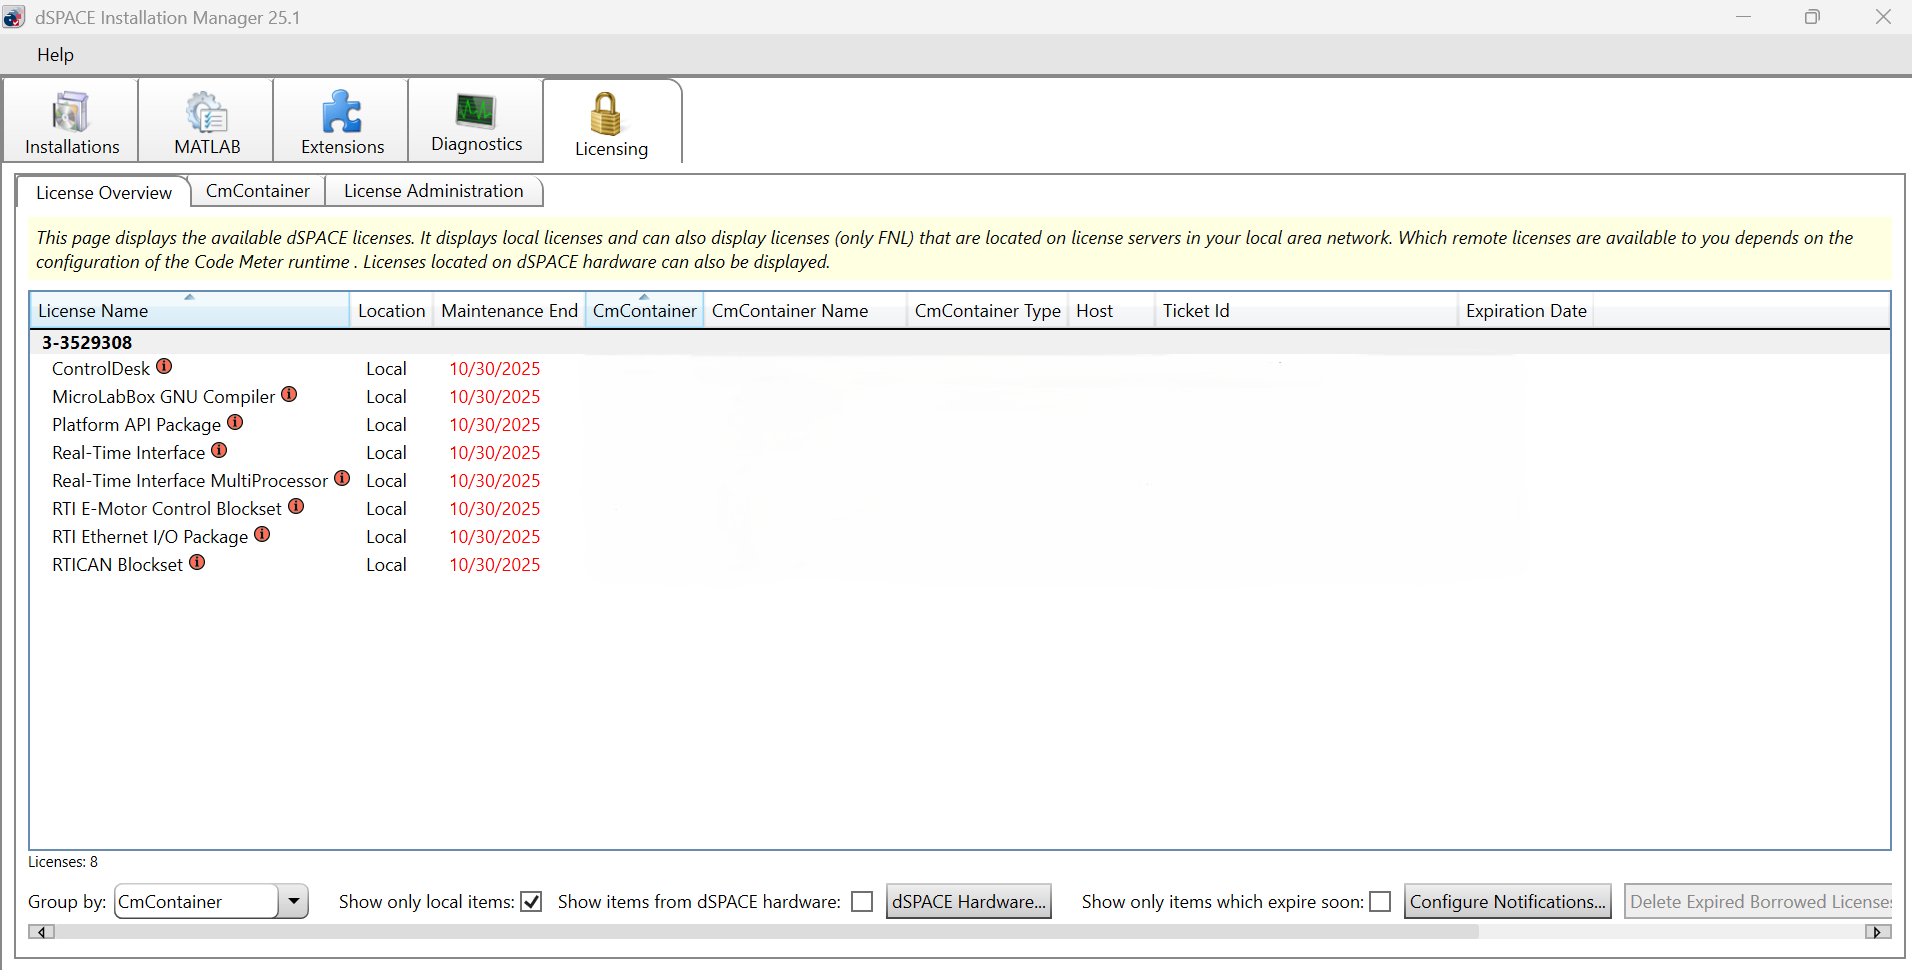
After downloading and installing all the software mentioned above, go to this option and hit Decrypt all, dSPACE installation manager with decrypt only the software for which you have license for.

This should give you the software decrypted and ready to go. In my case I only needed to decrypt dSPACE RCP and HIL Software 2024-A.
Running ControlDesk
For my application, I am connecting MicroLabBox 1 to my computer to read some analog signals. To do this I have to make a Simulink model, then build a .sdf file, flash the file using either Simulink Or ControlDesk and at the last read the signals coming into MicroLabBox through ControlDesk.
Matlab side
After all the above installations, open Matlab, you should get popups indiacting that now Matlab knows the Real-time-interface (RTI) with dSPACE MicroLabBox. After allowing those popups to continue Matlab loads something like this

While creating a Simulink model , you can now access dSPACE related Simulink tools which looks like below
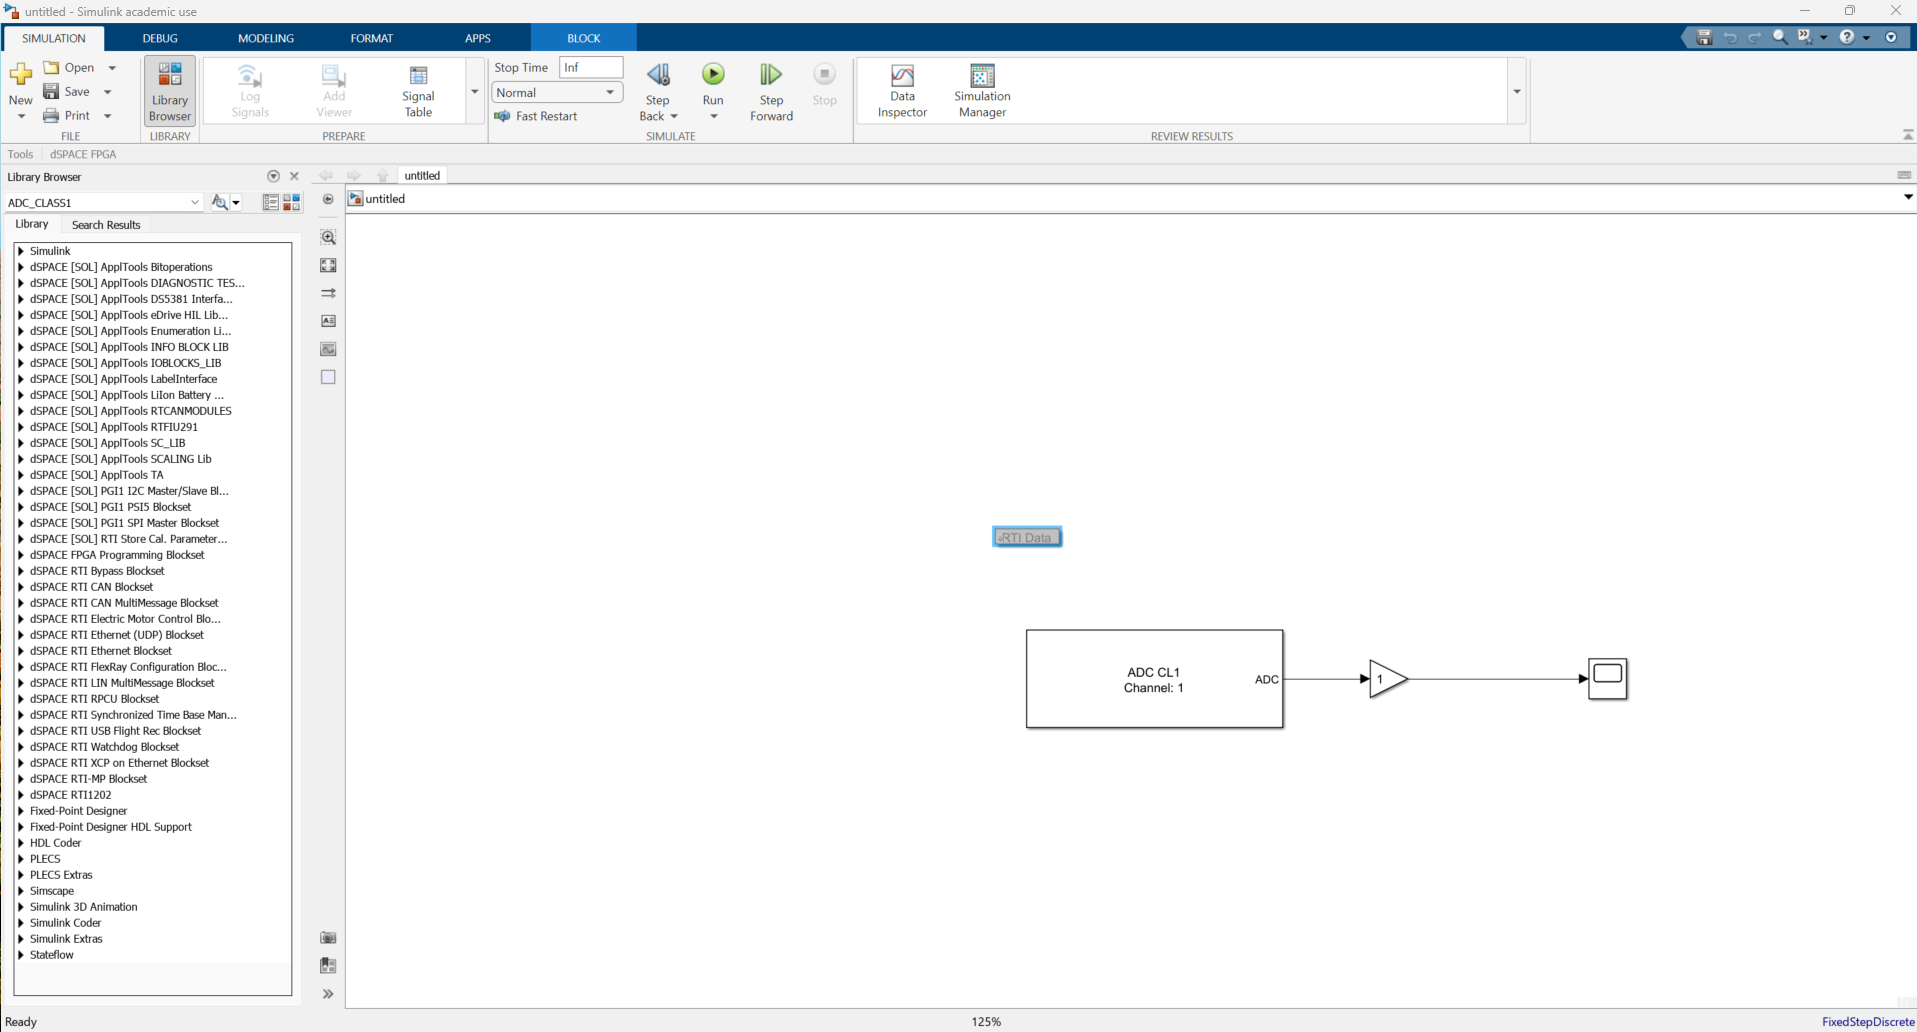
Make sure that Simulink model which you would like to build into MicroLabBox has the gray RTI Data block as shown in the above picture. Make sure the solver is discrete with a fixed-step size.

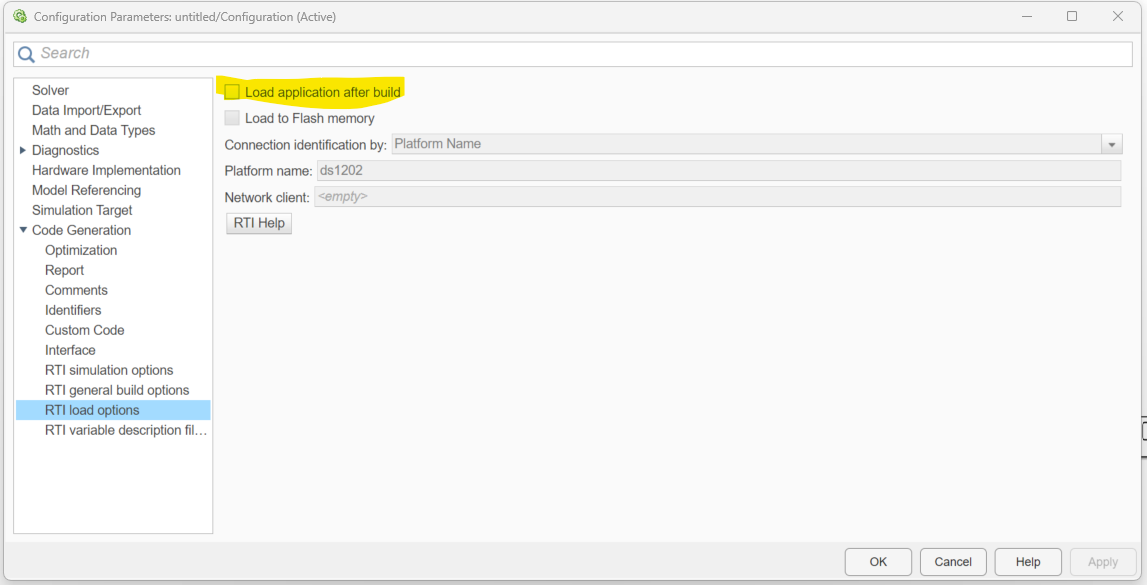
You can also build and load from the Simulink, if you wish to load it from ControlDesk instead then uncheck the box as shown below .
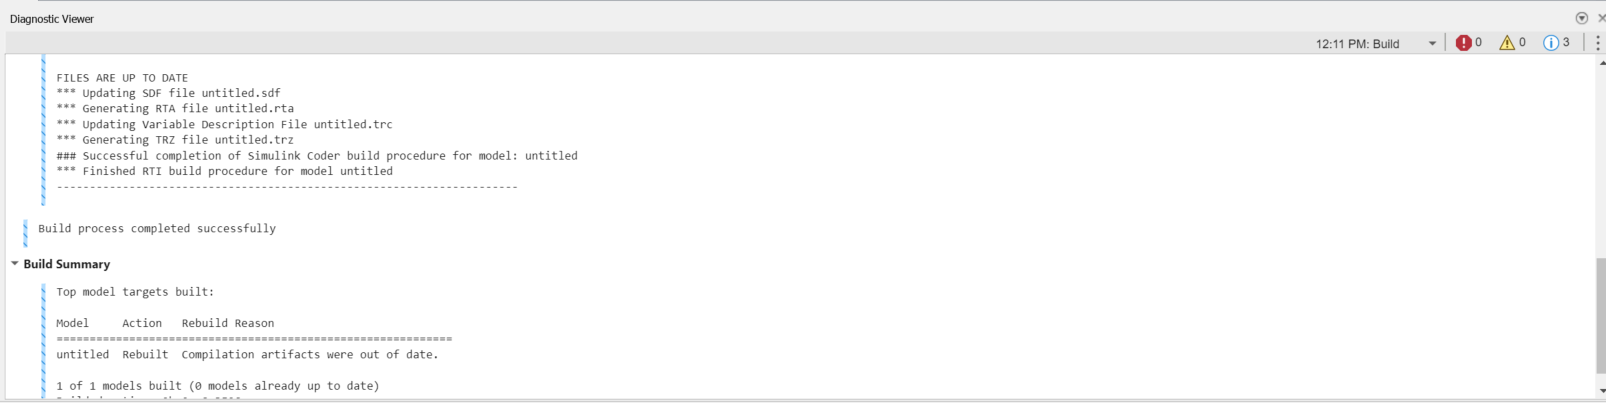
Now hit Ctlr+B to build the model and generate .sdf file. Simulink diagnostics screen should like below if everything is right order.
ControlDesk side
Make sure your computer is connected to MicroLabBox through ethernet and is accessible through its default IP address. Open ControlDesk and register MicroLabBox with the ControlDesk software like below. You can enter the IP for ControlDesk to access and register the MicroLabBox.
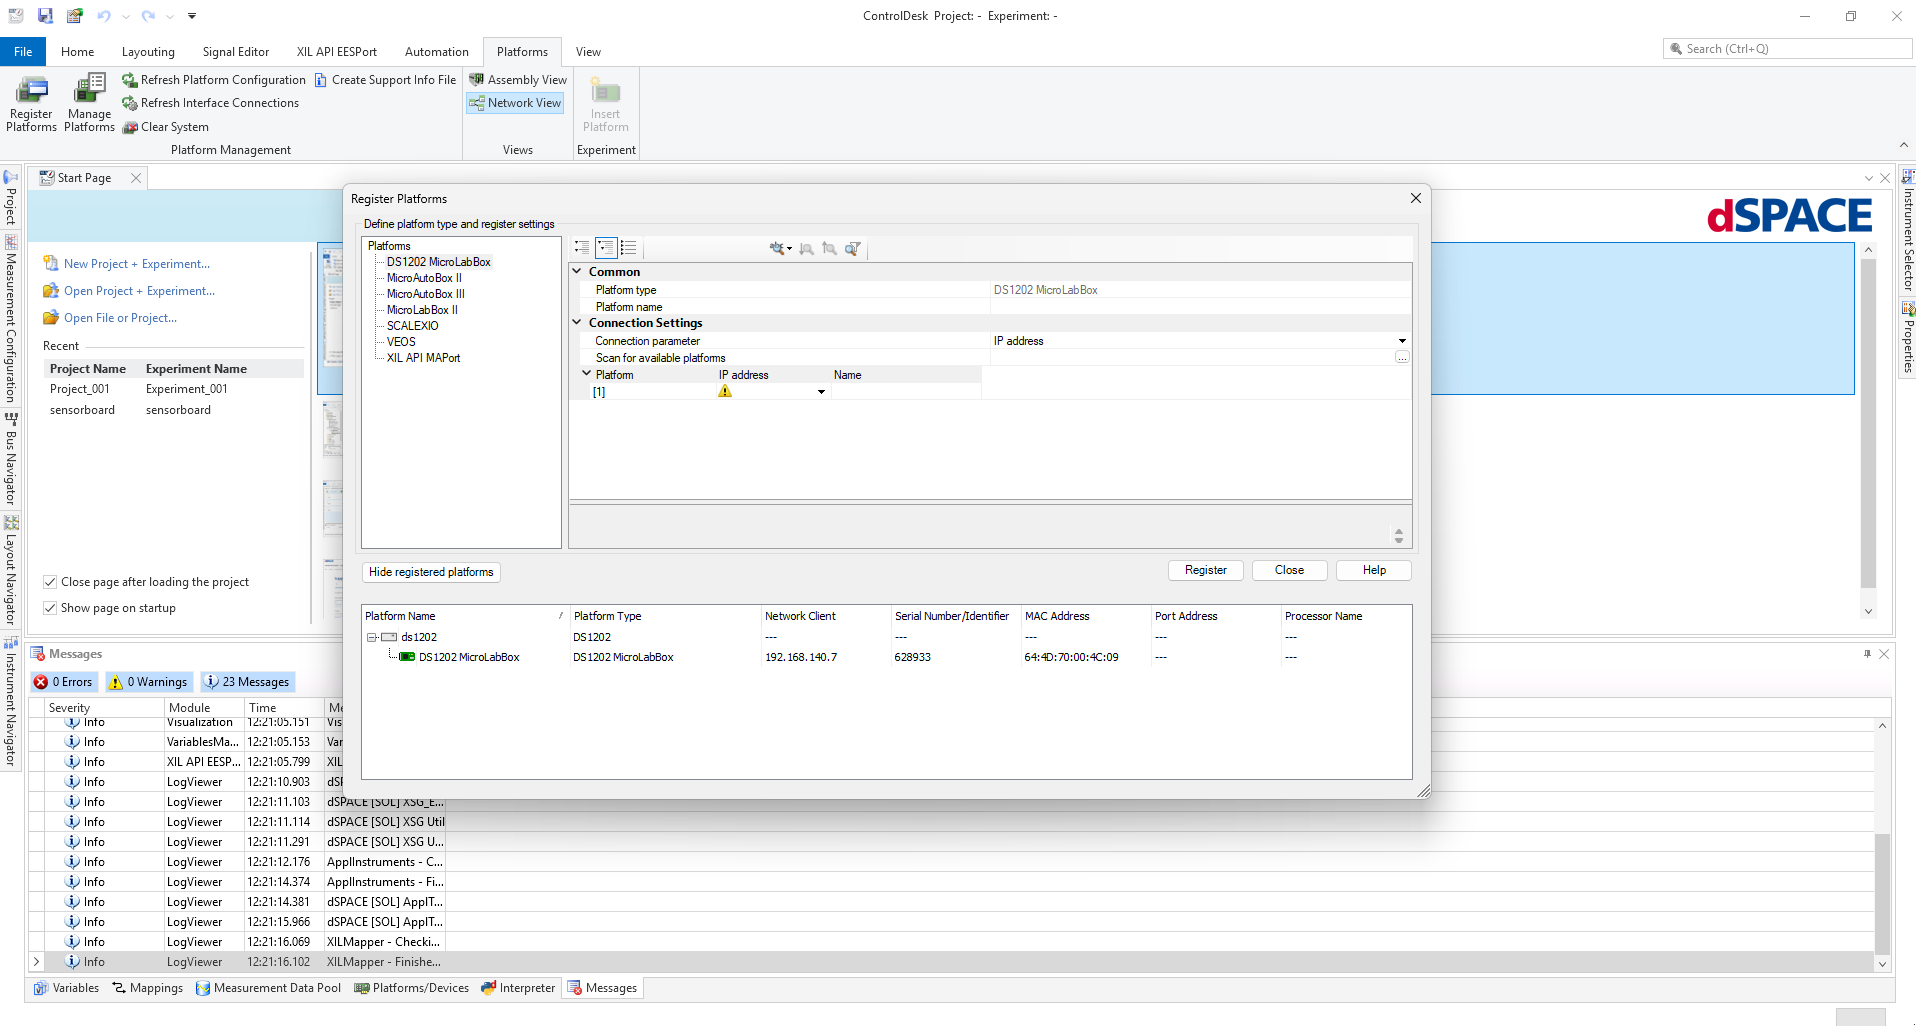
Now create a New Project + Experiment on ControlDesk. Then select the right MicroLabBox version.
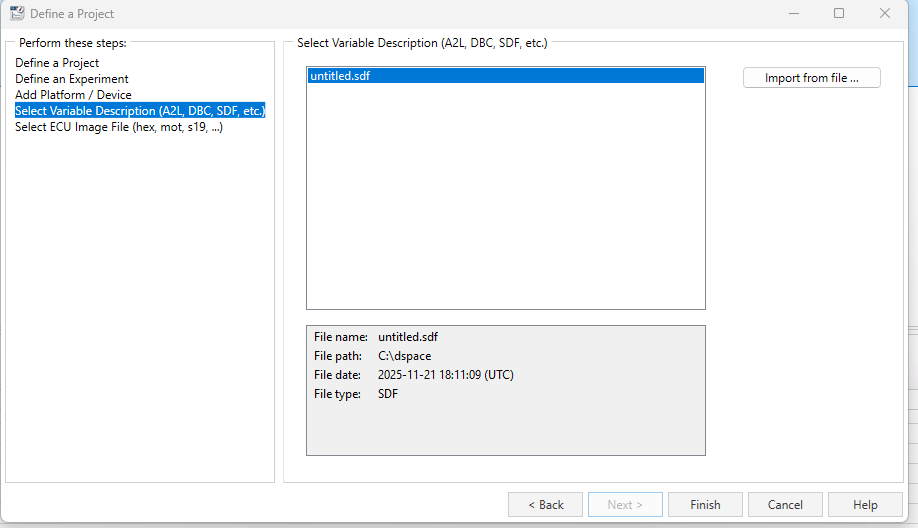
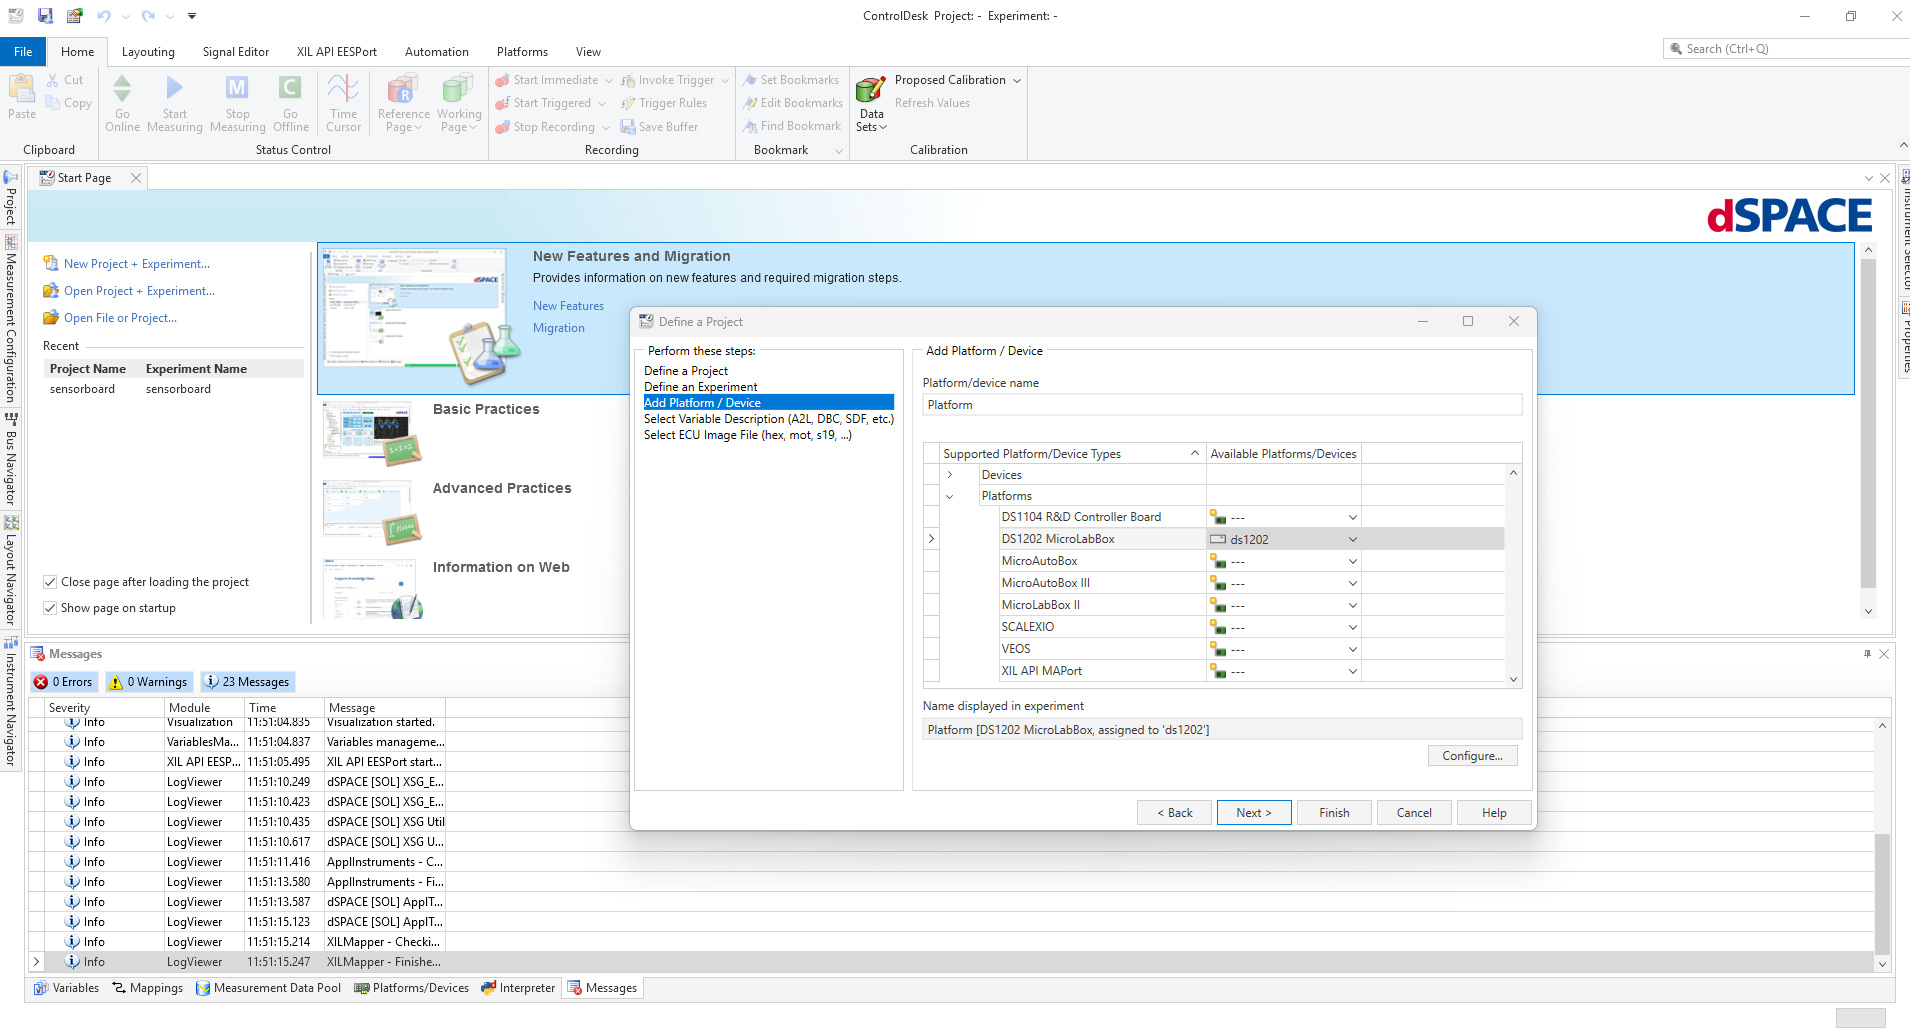 Load the .sdf file from the Simulink project folder you created earlier.
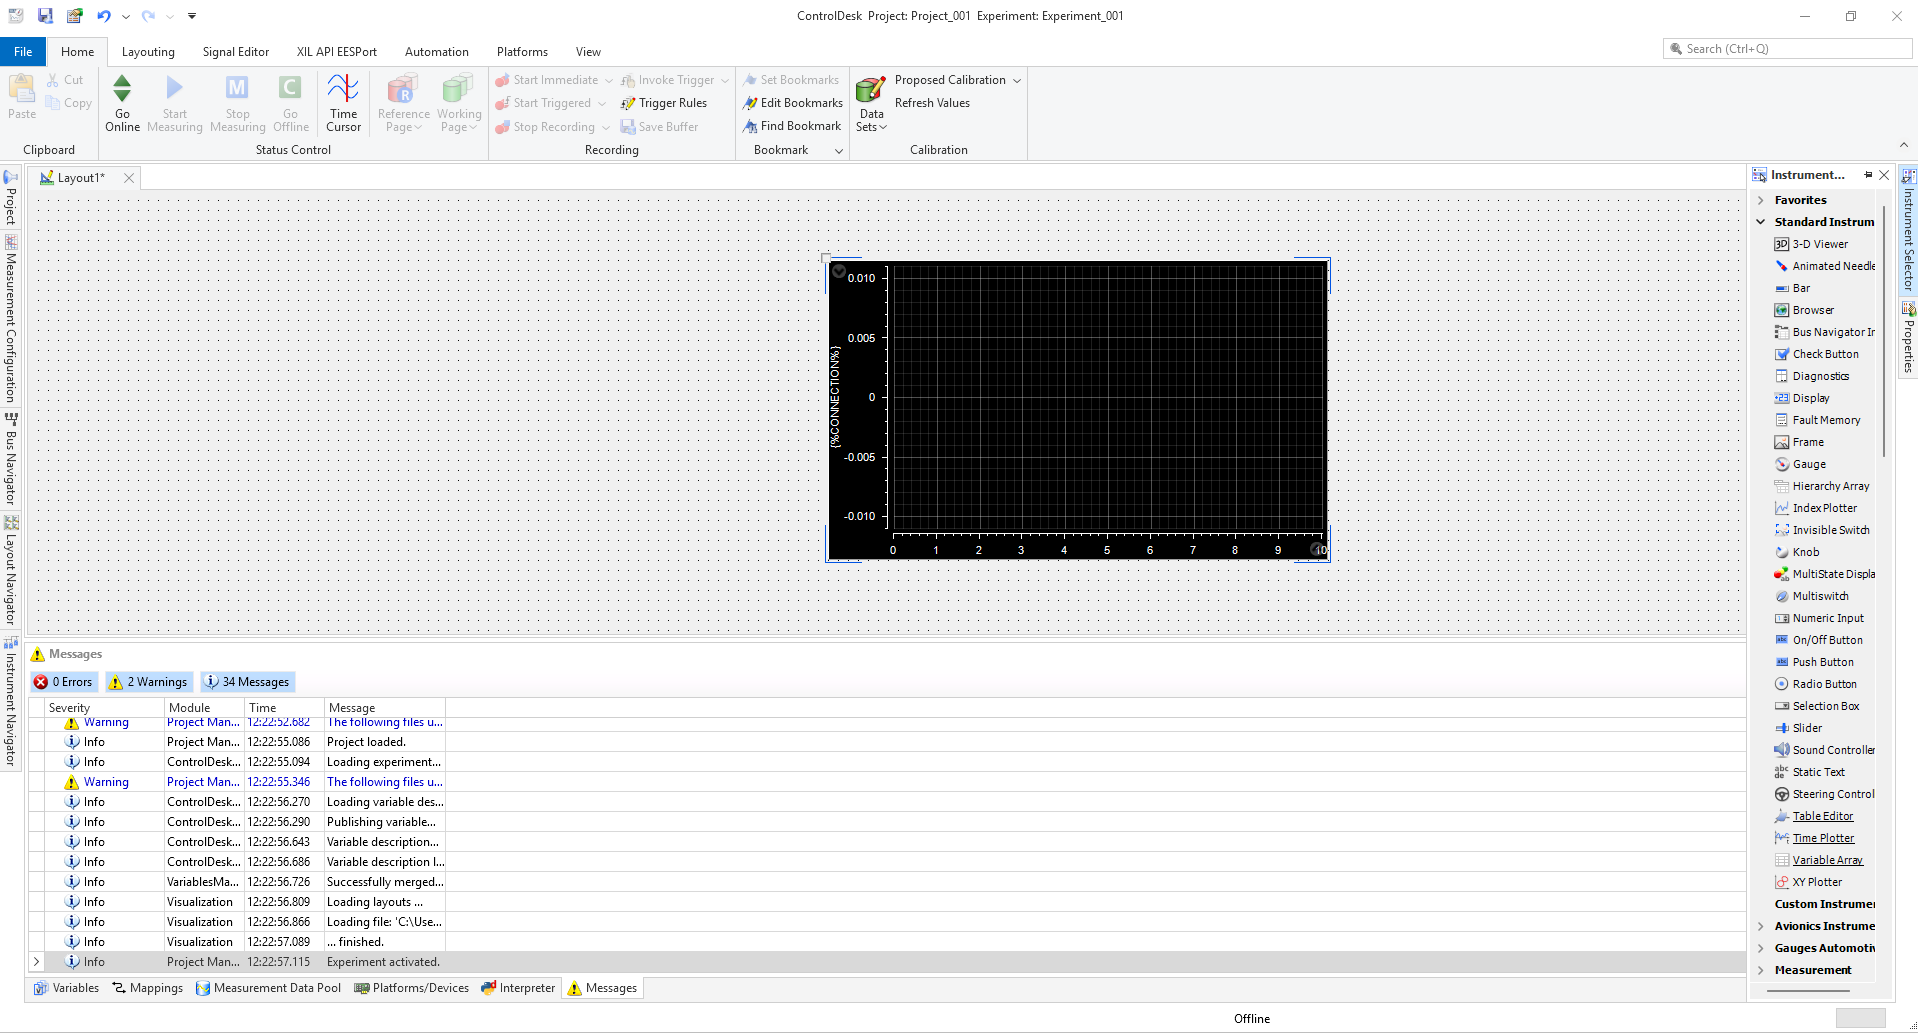
For our application we want to plot the scope data shown in the above Simulink model. Once the project is created, we place Time Plotter from Instrument Selector as shown below.
To add signal to this Time Plotter, right click on it and select Variables and select Add
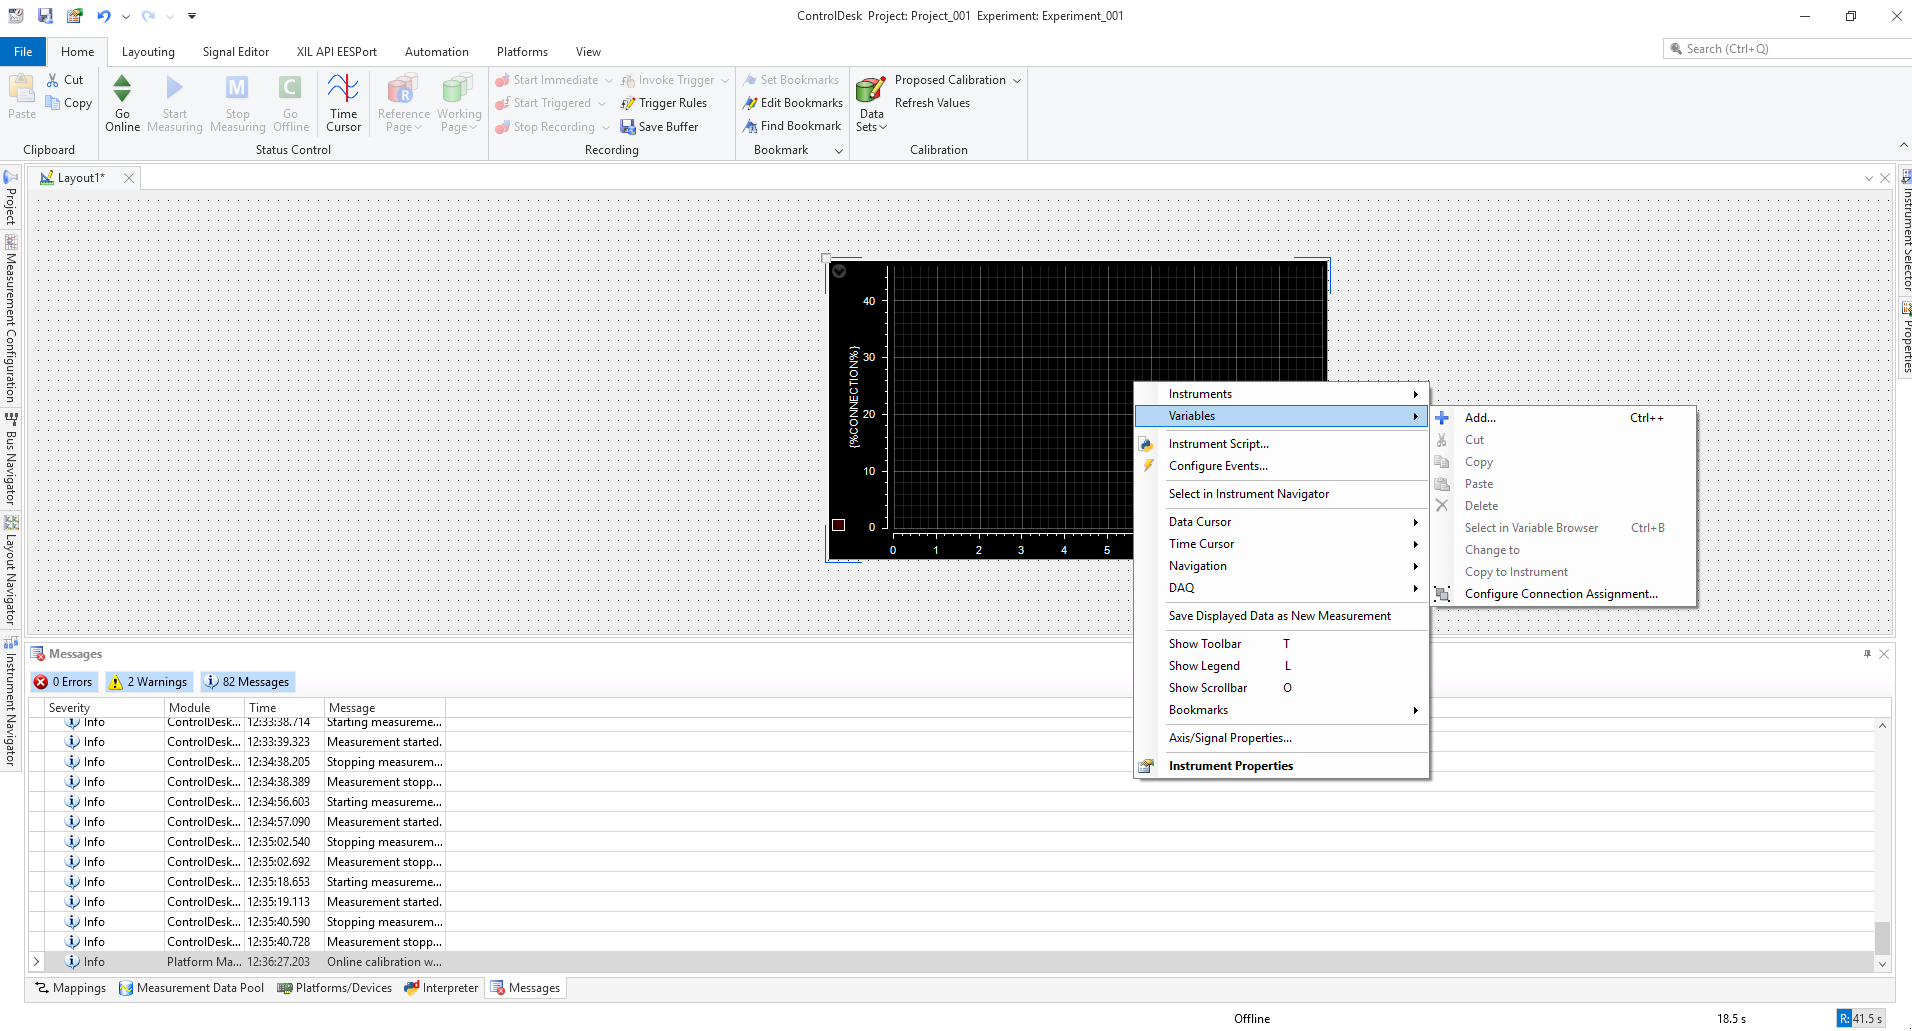
Then double click on your .sdf file name , then double click on Model Root then select which ever signal you want to measure. Since I am interested in Scope data, I am selecting Scope.
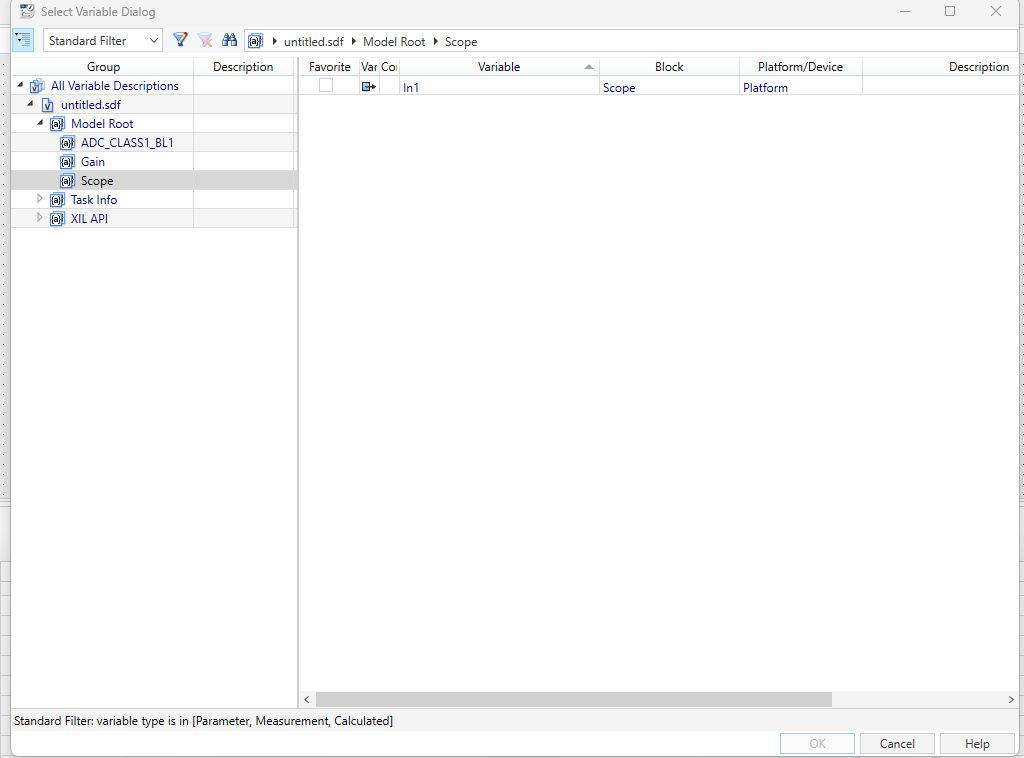
After selecting In1, now the Time Plotter know the right signal to track. To look at the signal in the plotter in real-time, hit Go Online then hit Start Measuring at the top left corner shown below
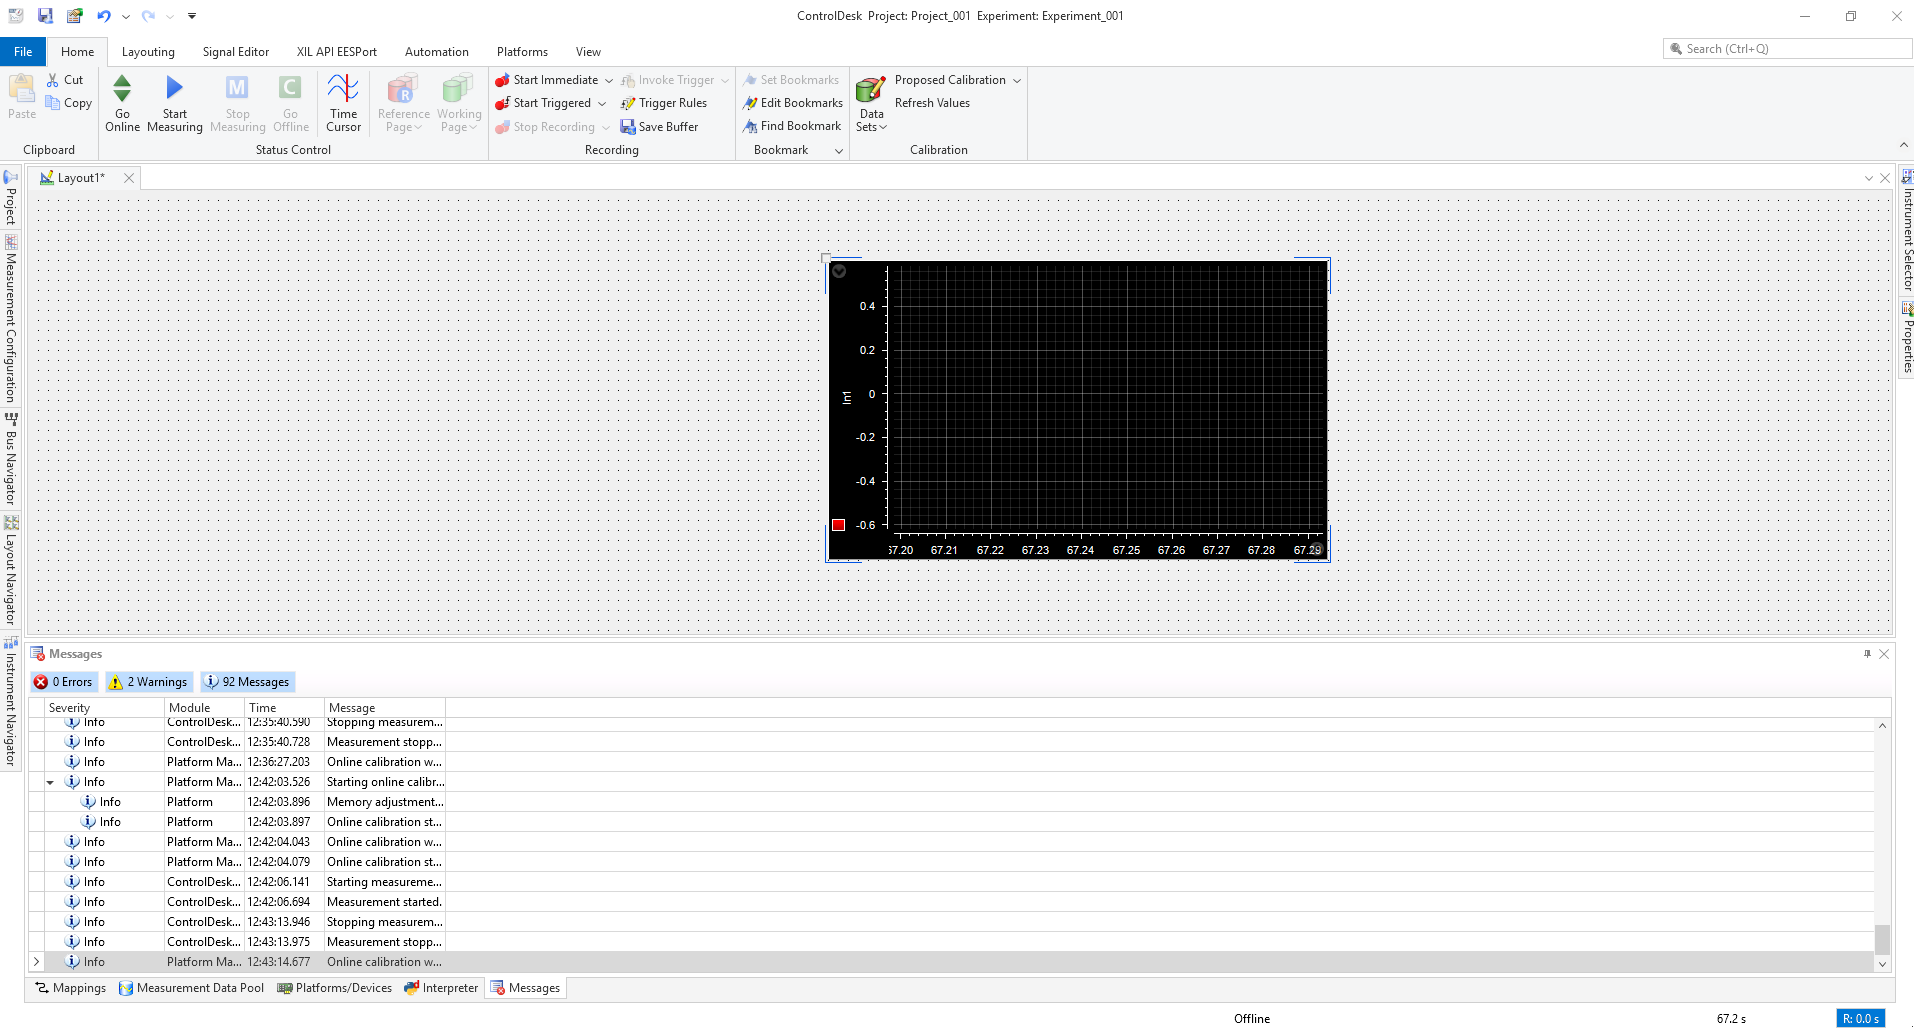
Now you should be able to see the signal being shown on the Time Plotter in real-time.

To Conclude
This page gives to an idea to tie dSPACE ControlDesk software to Simulink so that FPGA tools like MicroLabBox can be utilized to realize the models created in Simulink. Hope this helps. For any query reach out ot pbhagwat2@wisc.edu.